Best Water Flossers for Sensitive Gums After Extraction
Written & Researched By
Editorial Team · product research desk
Sources: ADA guidelines, Mayo Clinic, PubMed, peer-reviewed dental literature
Published: March 31, 2026
Affiliate Disclosure: This article contains affiliate links. If you purchase through our links, we may earn a small commission at no extra cost to you. This supports our ability to provide free, medically reviewed content. See our full disclosure.
Short answer: A countertop water flosser with adjustable pressure settings (like the Waterpik Aquarius or ION) is the best choice for post-extraction oral care. The ability to dial pressure down to a gentle setting is essential — your gums need cleaning, but aggressive water jets near a healing extraction socket can dislodge the blood clot and cause dry socket.
Keeping your mouth clean after extraction is important for preventing infection. But brushing near the surgical site is painful and risky during the first week. A water flosser bridges this gap by letting you keep the rest of the mouth clean without putting a brush head on the extraction site.
A single irrigator review is Water Flosser for Sensitive Gums.
Listing check: We opened the tagged Amazon irrigator URLs and confirmed adjustable-pressure listings. Confirm reservoir size and tip count on Amazon. This is a convenience note, not a treatment claim.
For more on this topic, see our guide on Best Soft Toothbrushes for Post-Extraction Recovery.
Why Water Flossers Matter After Extraction
For more on this topic, see our guide on Best Ice Packs for Jaw Pain After Tooth Extraction.
After a tooth extraction, your dentist will likely advise you to avoid brushing directly at the extraction site for at least 3 to 7 days. But bacteria don’t take a break — food particles and plaque continue accumulating, and the risk of infection at the extraction site is real.
A water flosser serves several purposes during recovery:
- Gentle cleaning around teeth adjacent to the extraction without touching the site
- Flushing debris from hard-to-reach areas where food tends to collect during a soft food diet
- Reducing bacteria in the mouth without the mechanical trauma of a toothbrush
- Warm salt water delivery — some patients use their water flosser with warm salt water for therapeutic rinsing after the first 24 hours (check with your dentist first)
Important: Wait at least 24 hours after extraction before using a water flosser. Keep the pressure low and avoid directing the stream directly into the extraction socket for the first week.
What to Look for in a Post-Extraction Water Flosser
Adjustable pressure control is the most important feature. You need the ability to start at the lowest pressure setting and gradually increase as your extraction heals. Fixed-pressure or high-pressure-only models are risky during recovery.
Multiple tip options. A standard jet tip works for general cleaning, but an orthodontic tip or a periodontal pocket tip provides gentler, more directed cleaning that’s ideal for sensitive areas.
Reservoir size. Countertop models hold 20 to 30+ ounces, enough for a full cleaning session without refilling. Cordless travel models hold 5 to 10 ounces, which may require refilling.
Quiet operation. When you’re recovering and potentially on pain medication, a quieter motor is a comfort bonus.
Top Water Flosser Options
1. Countertop Water Flossers
Best for: Home use during the full recovery period
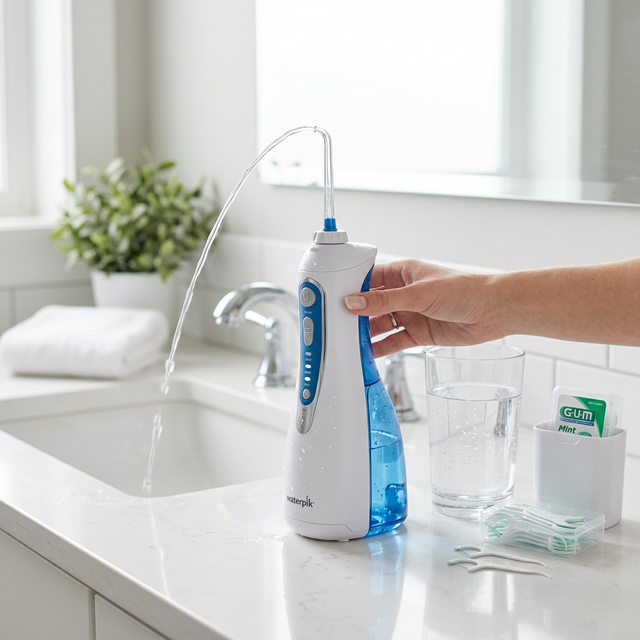
Full-sized units that sit on your bathroom counter with a large water reservoir and a corded wand. Models from Waterpik, Bitvae, and H2ofloss are popular in this category.
Pros:
- 10 pressure settings (most models), start at the lowest for post-extraction
- Large reservoir (22+ oz), no refilling mid-session
- Multiple tips included (standard, orthodontic, periodontal)
- Most consistent water pressure throughout the session
- Proven effectiveness, Waterpik models carry the ADA Seal of Acceptance
Cons:
- Requires counter space and an outlet
- Not portable
- Higher price point ($50 to $100)
2. Cordless/Portable Water Flossers
Best for: Travel, small bathrooms, or secondary flosser
Battery or USB-rechargeable handheld devices with built-in water tanks. Brands include Waterpik Cordless, Bitvae, and Nicwell.
Pros:
- Portable, bring it to work or when traveling
- No counter space needed
- USB rechargeable (most models)
- Affordable ($25 to $50)
- Multiple pressure modes
Cons:
- Smaller reservoir (5 to 10 oz), may need to refill
- Fewer pressure settings (typically 3 to 5 vs. 10)
- Battery can run low mid-session
- Water pressure may be less consistent than countertop models
3. Faucet-Connected Water Flossers
Best for: Unlimited water supply, no charging needed
Devices that connect directly to your bathroom faucet for continuous water supply. No batteries, no reservoir to fill.
Pros:
- Unlimited water, no refilling or recharging
- Consistent pressure from your water line
- Less to clean (no reservoir)
- Good for thorough, extended cleaning sessions
Cons:
- Tethered to the faucet, less flexible positioning
- Fewer models available with fine pressure control
- May not fit all faucet types
- Pressure depends on your home water supply
Comparison Table
| Feature | Countertop | Cordless | Faucet |
|---|---|---|---|
| Price | $50–$100 | $25–$50 | $30–$60 |
| Pressure Settings | 10 | 3–5 | Variable |
| Reservoir | 22+ oz | 5–10 oz | Unlimited |
| Portability | No | Yes | No |
| Best for extraction | ⭐⭐⭐⭐⭐ | ⭐⭐⭐⭐ | ⭐⭐⭐ |
How to Use a Water Flosser After Extraction
Week 1 (days 1 to 7):
- Wait at least 24 hours before first use
- Set pressure to the lowest available setting
- Start with teeth farthest from the extraction site
- Work toward the extraction area gradually, but don’t aim directly into the socket
- Use warm water (or warm salt water if your dentist approves)
- Keep sessions short, 30 to 60 seconds initially
Week 2 (days 7 to 14):
- Gradually increase pressure as comfort allows
- You can begin cleaning closer to the extraction site
- Use the standard tip for a thorough clean
- Resume normal flossing duration (2 minutes)
Week 3+:
- Use normally at your preferred pressure
- The extraction site should be covered by gum tissue at this point
Important Safety Notes
- Never direct a high-pressure water stream into the extraction socket during the first week
- Avoid suction-creating motions, don’t swish water forcefully around the extraction area
- Use warm water, cold water can cause discomfort in sensitive areas
- Replace tips every 3 to 6 months for hygienic performance
Our Recommendation
For most extraction patients: A countertop water flosser with 10 pressure settings. The investment pays off, you’ll use it daily long after your extraction heals, and the fine pressure control is essential during those sensitive first weeks.
On a budget: A cordless model with at least 3 pressure modes. Make sure it has a genuinely gentle low setting.
Our Top Amazon Picks
| Product | Price | Rating | Best For |
|---|---|---|---|
| Waterpik Aquarius WP-660 | $79.99 | ⭐ 4.6 | Best countertop, 10 pressure settings |
| Waterpik Cordless Advanced WP-580 | $99.99 | ⭐ 4.5 | Best cordless |
| COSLUS Portable Cordless | $29.99 | ⭐ 4.3 | Best budget portable |
Our pick: The Waterpik Aquarius WP-660 (⭐ 4.6, $79.99) is the gold standard specifically because of its 10-speed pressure range, a feature that matters enormously during extraction recovery. Cheaper water flossers typically offer 3 settings, which often means the lowest setting is still too forceful for a fresh surgical wound. The Aquarius’s lowest setting is genuinely gentle, safe to use around the extraction site starting around day 7 when the clot has stabilized. It’s also ADA-accepted and widely recommended by dental hygienists, which adds confidence. For travel or anyone who wants cordless convenience, the COSLUS at $29.99 is a capable budget alternative, just keep the pressure on its lowest setting for the first two weeks.
Key Takeaway
A water flosser is one of the most practical oral care tools for extraction recovery. It lets you maintain oral hygiene during the weeks when traditional brushing and flossing near the extraction site aren’t possible. The key is adjustable pressure, start low, go slow, and avoid the extraction socket directly during the first week.
Written and researched by the editorial team. Sources: ADA guidelines, Mayo Clinic, peer-reviewed dental literature.
Sources: American Dental Association; Journal of Clinical Periodontology.