Best Blenders for Soft Food After Dental Surgery
Written & Researched By
Editorial Team · product research desk
Sources: ADA guidelines, Mayo Clinic, PubMed, peer-reviewed dental literature
Published: March 31, 2026
Affiliate Disclosure: This article contains affiliate links. If you purchase through our links, we may earn a small commission at no extra cost to you. This supports our ability to provide free, medically reviewed content. See our full disclosure.
Short answer: A personal blender (like the NutriBullet or Ninja Personal) is the best choice for most post-extraction patients. They’re affordable, easy to clean with one hand, and powerful enough to make smooth soups, smoothies, and puréed meals — all essential parts of a comfortable recovery diet.
After a tooth extraction, your diet shifts dramatically. Hard, crunchy, and chewy foods are off the table for at least 3 to 7 days (longer after wisdom teeth removal). A good blender turns healthy ingredients into meals you can actually eat without aggravating the extraction site.
Listing check: We opened the tagged Amazon blender URLs in this article and confirmed each destination is a personal or countertop blender listing. Notes below are about cup size, one-handed cleanup, and puree texture — not Amazon’s feature copy. Confirm the live model name before you buy.
Why the Right Blender Matters for Recovery
During extraction recovery, you need to consume adequate nutrition without chewing. This is harder than it sounds — most people default to ice cream and applesauce, which are fine for a day or two but lack the protein, vitamins, and minerals your body needs for tissue repair.
A blender lets you:
- Make protein-rich smoothies with Greek yogurt, protein powder, nut butter, and banana
- Prepare puréed soups from cooked vegetables and broth
- Blend complete meals into smooth, drinkable consistency
- Control temperature — warm soups or cold smoothies, depending on what feels good
For a complete meal plan, see our 7-day soft food recovery plan.
Best Blender Types for Dental Recovery
1. Personal/Single-Serve Blenders
Best for: Most extraction recovery patients
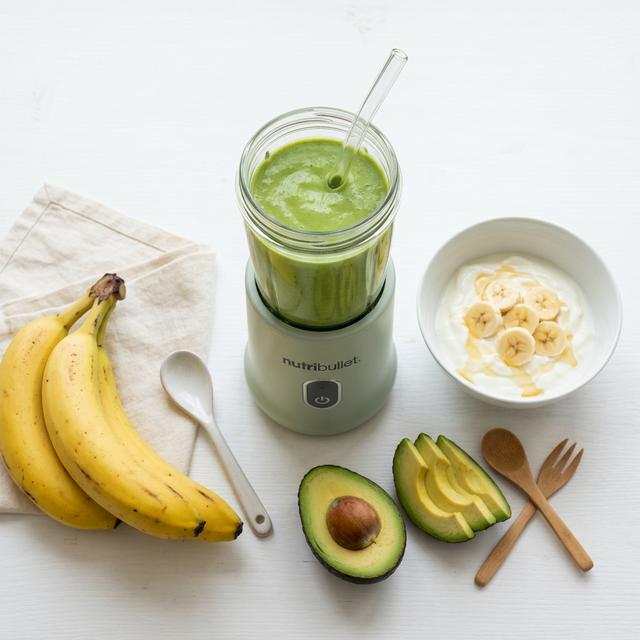
Small, countertop blenders with a single-serve cup that doubles as a drinking vessel. Popular models include NutriBullet Pro, Ninja Nutri Pro, and Hamilton Beach Personal Blender.
Why they’re ideal for recovery:
- One-cup cleanup, blend and drink from the same cup (less effort when you’re uncomfortable)
- Single-serving portions, no large batches sitting in the fridge
- Enough power for smoothies, soups, and soft food purées (600 to 1000 watts)
- Compact, doesn’t take up counter space in a kitchen you may not be using much
- Affordable, most models $30 to $60
Considerations:
- May struggle with very fibrous vegetables or large ice chunks
- Smaller capacity (16 to 24 oz) limits batch cooking
- Some models have loud motors
Ideal recovery recipes: Banana + yogurt + protein powder smoothies, blended oatmeal, avocado smoothies, puréed vegetable soups.
2. Full-Size Countertop Blenders
Best for: Families or batch meal preppers
Standard blenders like the Vitamix, Blendtec, or KitchenAid with 48 to 64 oz pitchers. More power, more capacity, and the ability to handle hot soups.
Why they work for recovery:
- More powerful motors (1000 to 1500+ watts) handle anything you throw in
- Hot soup capability, some models can heat soup through blade friction alone
- Larger batches, make puréed soup for multiple meals at once
- Smoother results, high-speed blending eliminates all texture
Considerations:
- More expensive ($100 to $500+)
- Larger pitcher is harder to clean when you’re in pain
- Takes up significant counter space
- Overkill for single-serve smoothies
Ideal recovery recipes: Large-batch puréed soups (butternut squash, tomato basil, potato leek), smoothie bowls, blended pasta sauces.
3. Immersion (Hand/Stick) Blenders
Best for: Soup lovers and one-pot cooks
Handheld wand-style blenders that you submerge directly into a pot or bowl. Brands like Breville, Cuisinart, and Mueller offer models in the $25 to $80 range.
Why they’re good for recovery:
- Blend in the pot, no transferring hot soup to a blender (safer and easier)
- Easy cleanup, just rinse the wand
- Compact storage, fits in a drawer
- Low cost for what they do
Considerations:
- Struggling with frozen fruits, better suited for cooked ingredients
- May not achieve the same ultra-smooth texture as a high-speed blender
- Requires you to hold the blender while operating (one-handed)
- Can splash if not submerged properly
Ideal recovery recipes: Puréed soup directly in the pot, mashed potatoes, blended sauces, smooth gravies.
Comparison at a Glance
| Feature | Personal Blender | Full-Size Blender | Immersion Blender |
|---|---|---|---|
| Price | $30–$60 | $100–$500+ | $25–$80 |
| Best for | Smoothies, single meals | Batch soups, hot blending | In-pot soup purée |
| Cleanup | Easy (1 cup) | Moderate (large pitcher) | Easy (rinse wand) |
| Power | 600–1000W | 1000–1500W+ | 200–500W |
| Hot liquids | No (most models) | Yes (some models) | Yes |
| Counter space | Minimal | Large | Drawer storage |
| Recovery rating | ⭐⭐⭐⭐⭐ | ⭐⭐⭐⭐ | ⭐⭐⭐⭐ |
What to Blend During Recovery
Here are nutrient-dense recovery foods your blender can handle:
High protein (critical for healing):
- Greek yogurt + banana + protein powder
- Silken tofu + fruit + honey
- Cottage cheese + berries (blend smooth)
- Scrambled eggs puréed with broth
Vitamins C and A (support tissue repair):
- Mango + orange juice smoothie
- Sweet potato + carrot soup (cooked and blended)
- Tomato basil soup
Anti-inflammatory:
- Turmeric + ginger + banana smoothie
- Blended avocado with lemon
- Puréed beet soup
Calorie-dense (maintain weight):
- Peanut butter + banana + whole milk smoothie
- Avocado + cocoa powder + date smoothie
- Blended oatmeal with honey and butter
Buying Recommendations
If you just want the simplest option: Get a personal blender in the $30 to $40 range. It handles everything you need for recovery, cleans up fast, and you’ll keep using it long after healing.
If you already own a full-size blender: Use it. No need to buy anything new, just stock up on smoothie and soup ingredients before your extraction.
If you love soup: Add an immersion blender ($25 to $35) to your kit. Being able to purée soup directly in the pot is genuinely convenient during recovery.
Our Top Amazon Picks
| Product | Price | Rating | Best For |
|---|---|---|---|
| Ninja BN301 Nutri-Blender Plus | $69.99 | ⭐ 4.6 | Best overall power + capacity |
| Magic Bullet 11-Piece Set | $34.99 | ⭐ 4.4 | Best budget blender |
| iCucina Smoothie Blender | $45.99 | ⭐ 4.3 | Mid-range, solid performer |
Our pick: The Ninja BN301 (⭐ 4.6, $69.99) is the best all-around option for post-extraction soft food preparation. The 900W motor, nearly double the power of budget options, is what matters for recovery: it’s the difference between a completely smooth protein shake with no chunks to chew, and a lumpy one that’s both uncomfortable and potentially dangerous near a fresh extraction socket. The auto-clean function is a practical bonus when jaw pain makes even mundane tasks harder. For patients on a tighter budget, the Magic Bullet at $34.99 handles soft foods and smoothies reliably, it just takes a few extra pulses to get the same silky consistency.
Key Takeaway
Don’t underestimate how much easier a blender makes extraction recovery. Adequate nutrition directly impacts healing speed and comfort. A personal blender for $30 to $40 is the sweet spot for most patients, it’s powerful enough for any recovery recipe, easy to clean, and small enough for everyday use after you’ve healed.
Written and researched by the editorial team. Sources: ADA guidelines, Mayo Clinic, peer-reviewed dental literature.